I'm loving my new papercraft of quilling. Our local Agricultural Show is on this weekend, and I whipped up this little project in a hurry last Saturday night as it had to be delivered on the Sunday! Ahhh, deadlines, don't you love them? I really don't think I'd ever get anything done without them. Anyway, here's the photo gallery of my little native flower project...
 |
Making the components (note: there are a few 'ring-ins' here –
I didn't use all the pieces shown here to make the final artwork.) |
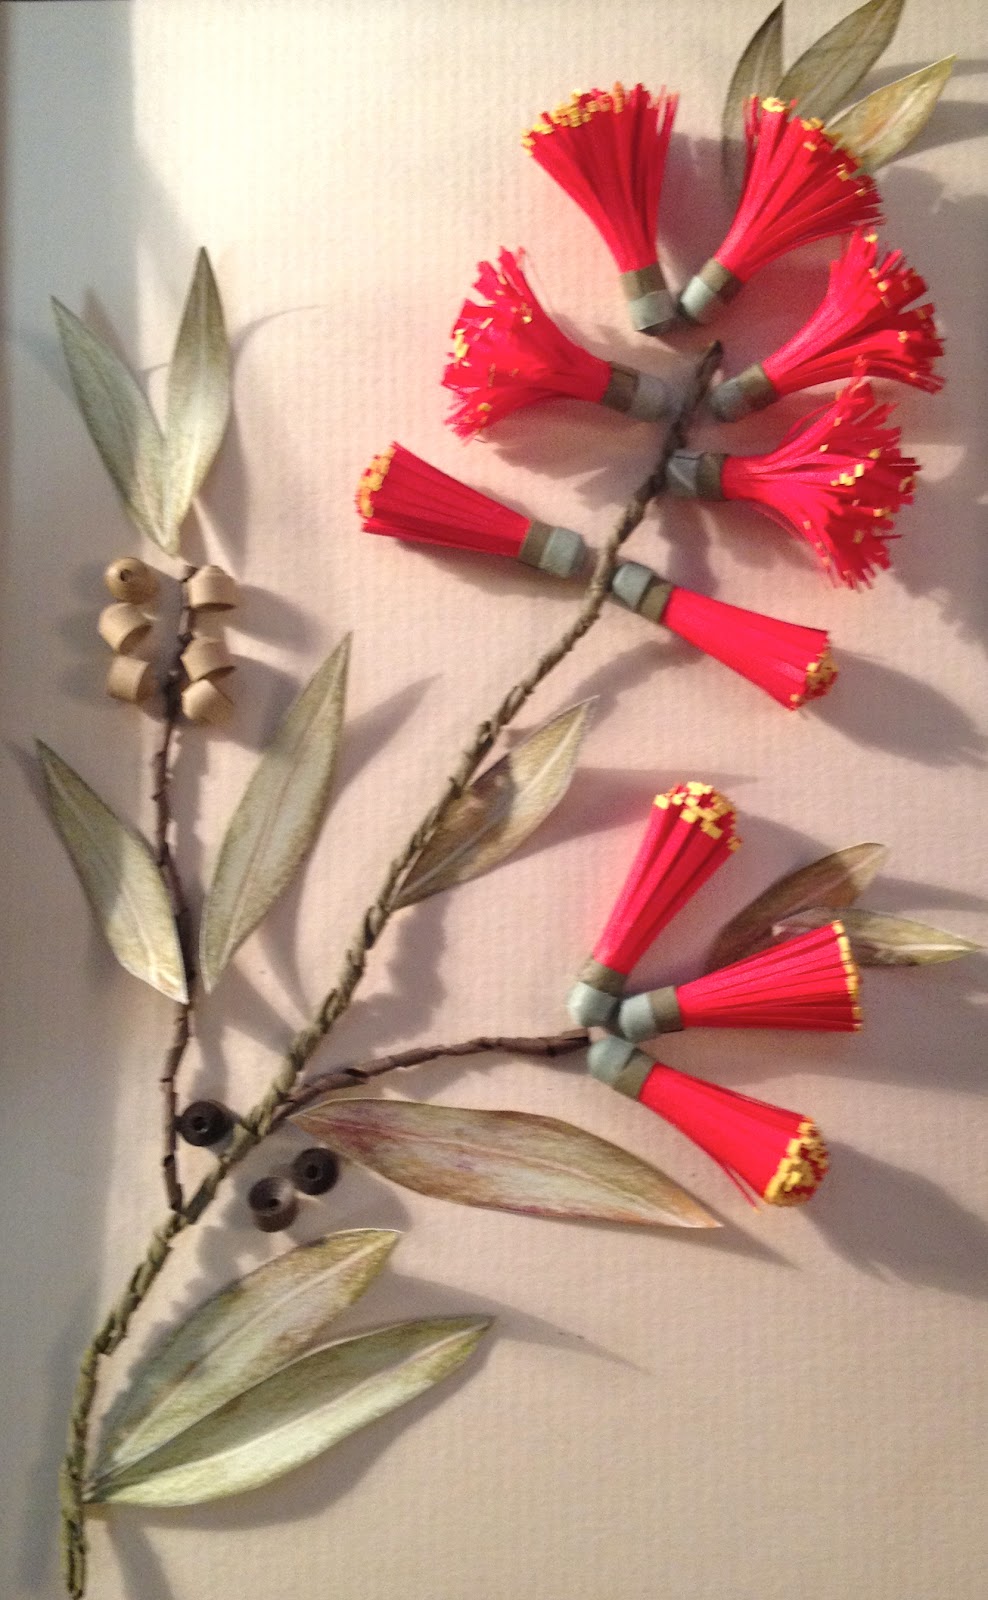
The red strip of paper with the thin edge of yellow (above right) is what I used to roll up to make the flowers. Each rolled fringed flower was then glued to a light green seed cup, and then a thin strip of darker green was glued around the base. You'll also notice that there are little tiny pieces of yellow paper on the green cut mat; some of yellow strip fell off as I cut the fringing (as it mustn't have been glued properly), but this was actually a good thing, as it meant I didn't have a yellow tip on every end, so it was more 'natural'.
I drew the leaf shapes onto an old envelope that was a lovely textured and speckled gum leaf green colour and then scored the vein down the centre using my scoring bone. I'm pretty sure the one I have is actually plastic, not bone – it was given to me by a paper merchant as a gift many years ago and is perfect for scoring paper to make it easier to fold, or in this case, to add impressions onto the paper. The final texture and colour on the leaves were created using colour pencils and then they were cut out and shaped by running through my fingers to get the leaf to curl in the right direction.
 |
| My scoring bone. |
 |
Working out the layout of the pieces before gluing
(and spreading the flowers petals out). |
 |
| Detail of the glued and assembled components. |
 |
| The finished piece with paper frame on a display stand. |